This month I participated in a card swap and this post will provide the measurements and details for this month’s swap card. All swaps were to be full cards with layers, using only current Stampin’Up! products, and highlighting items from the new Holiday Catalog. So I chose the Dashing Deer Bundle. Here are some photos taken in the dark to show how it looks with the tealight.

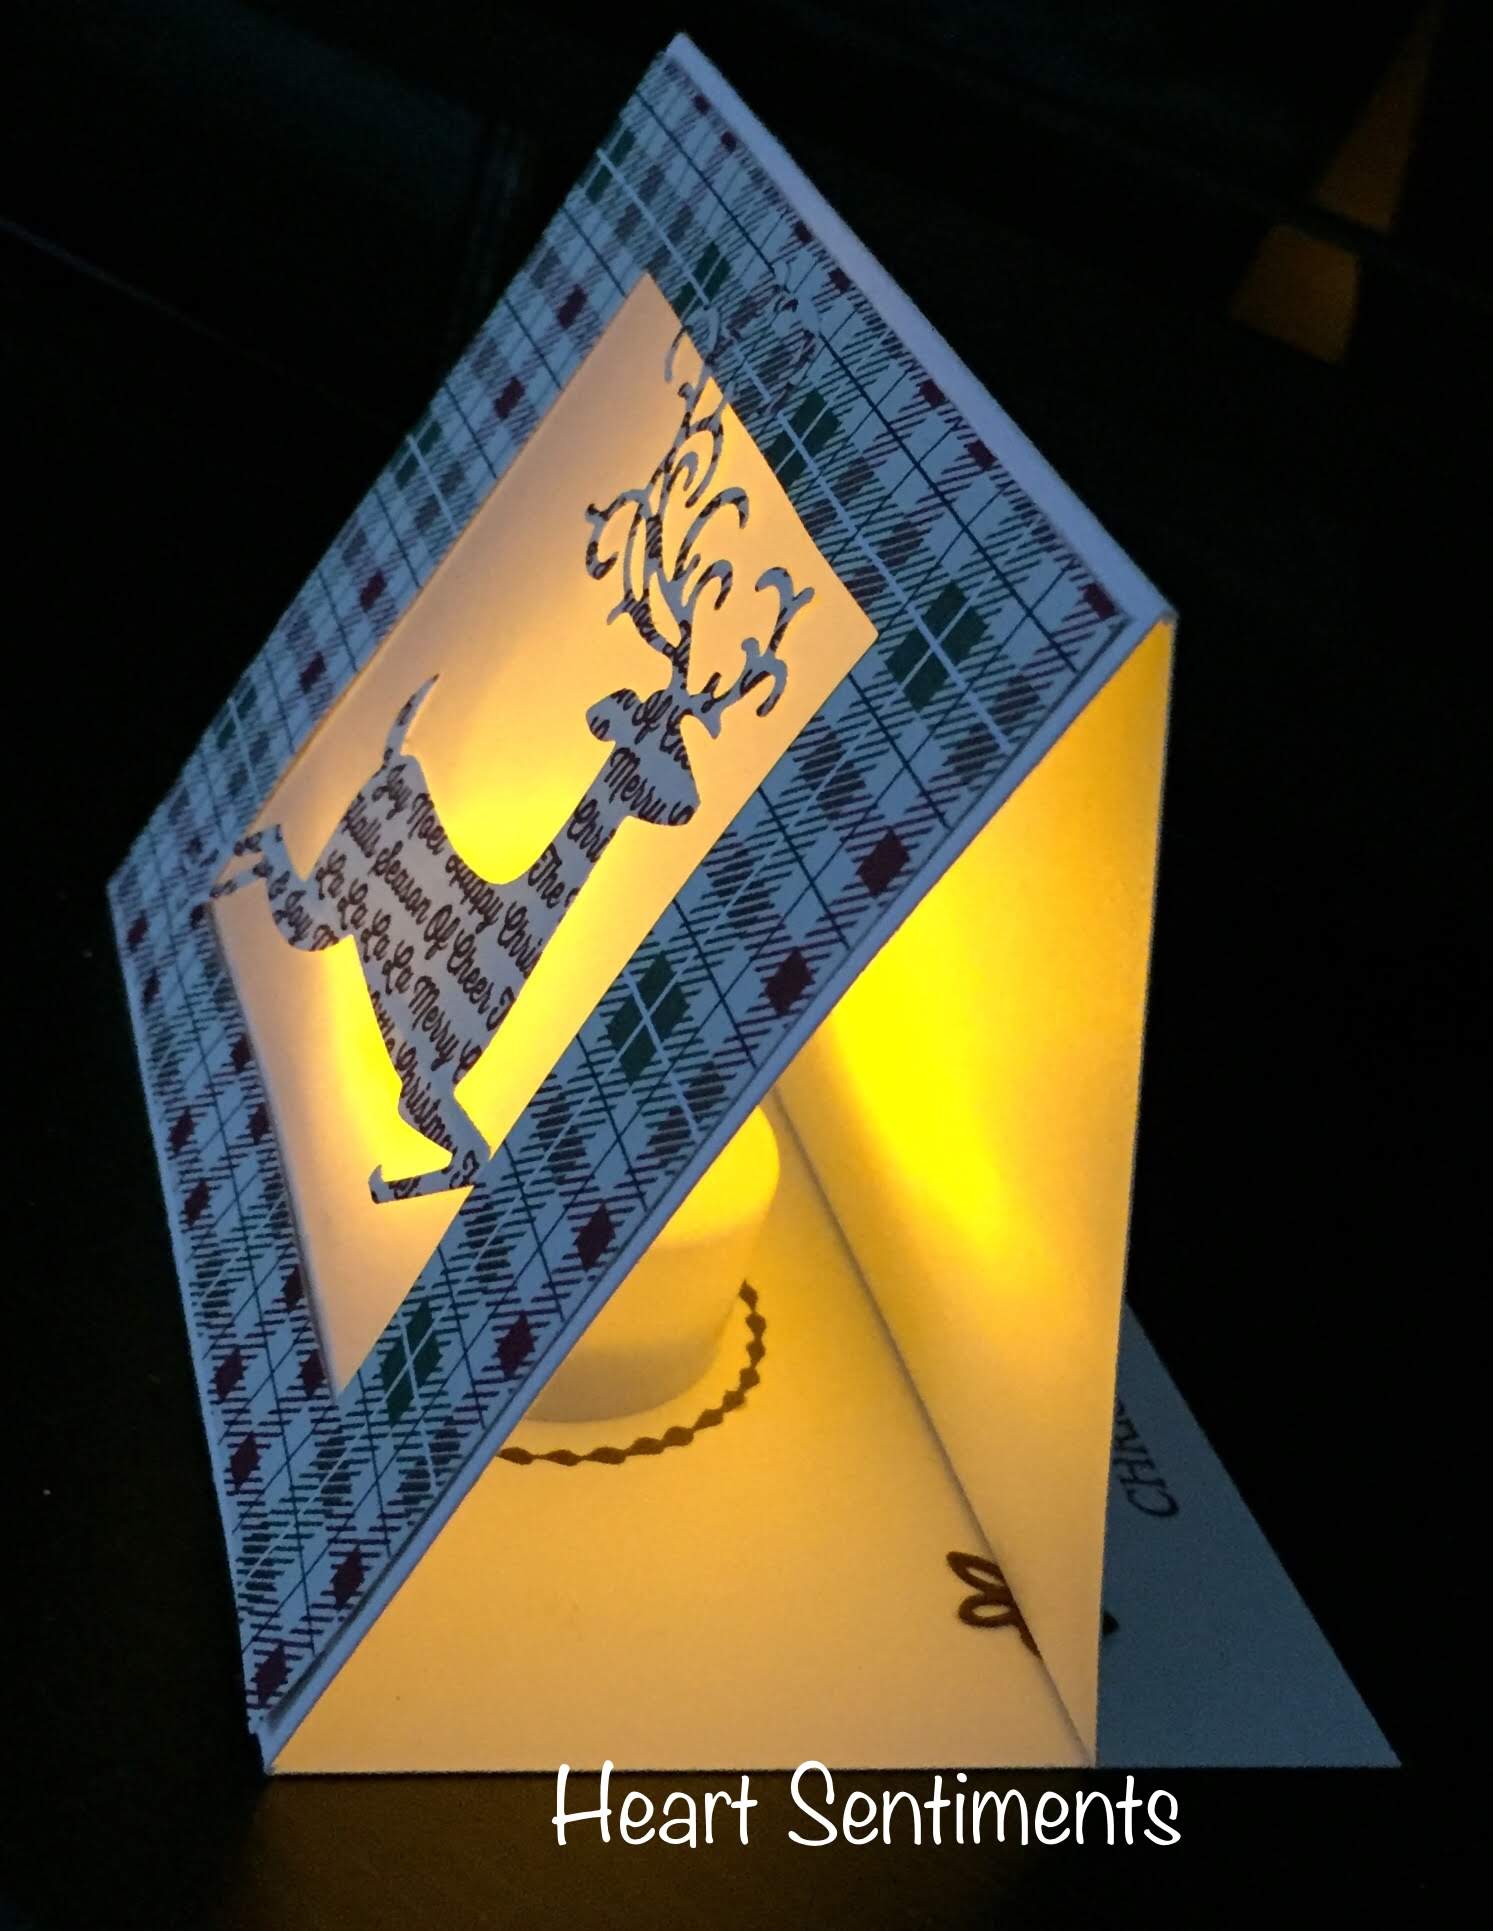
 This card uses a 4 1/4″ x 11″ card base, scored at 3 1/2″ from one end, and 3 3/4″ from the other. I used thick Very Vanilla card stock. The Designer Series Paper I used is the Festive Farmhouse DSP which was cut to 4 1/8″ x 3 5/8″. Lining up the DSP and centering it on the center panel of the card base, and using the 2 3/4″ square die from the Stitched Shaped Framelits, the DSP and card base were run through the Big Shot together with a single back and forth pass. Vellum was cut to 4″ x 3 1/2″. Using snail (liquid Tombo will warp the vellum, so make sure to use a tape adhesive), layer the vellum piece between the card base and the DSP. Before stamping or adhering any die cut to the center panel vellum, you’ll want to orient the card, so the the smaller panel (the one scored at 3 1/2″) is your bottom panel. If you use a patterned paper that has a particular orientation, you will want to make sure to cut it and adhere it in the right orientation. Since I was using a plaid pattern paper, it wasn’t important to know top or bottom of the card until I was ready to stamp.
Since this is a tent card, you will need to stamp the top panel of the card so that it is in the correct orientation to be read when it is tented. See photo.
I used the Stamparatus to speed things along since I was making 16 cards. This also made it easy to stamp the garland at the top and the bottom of this panel by simply adjusting the stamping plate.
The other sentiment was placed on the other Stamparatus plate and stamped on the bottom inside of the card base.
The reindeer was die cut using a different pattern from the same DSP and the bundle die. This was glued to the center front panel with the Fine Tip Glue. Other options for adhering this would be to sponge tombo very lightly to the back of the die cut, or to use the Sizzix adhesive sheets.
The little flowers were die cut from the framelits and added with glue dots and finished off with gold pearls. These act as a stopper for the top panel when the card is tented.
I also stamped a circle from the Eastern Beauty stamp set to show where to place the tealight. See photo.
Since I was making so many cards, I found this was the best order for constructing this card: Cut bases and score (but don’t fold on the score lines until the end, after you add embellishments). Cut the DSP and vellum. Die cut the center panel and DSP. Stamp the top panel; I used makers for inking up the garland. Stamp the bottom panel. Then adhere the vellum sandwich and the reindeer. Stamp the circle, add enbellishments, and finally fold on the score lines.
I must say that I was quite happy with how this turned out. I love make luminary cards for Christmas or special occasions.